Step-by-step Instructions
Step 1: Download the Feluda Binary
Feluda is a portable executable that acts as an MCP server. Download it from:
- Windows:
feluda.exe - macOS/Linux:
feluda(then runchmod +x feluda)
Step 2: Open MCP Settings in Cherry Studio
Launch Cherry Studio, then navigate to Settings → MCP Servers.
Step 3: Add Local MCP Server
Click the 安装 (Install) button or +Local, depending on your interface language.
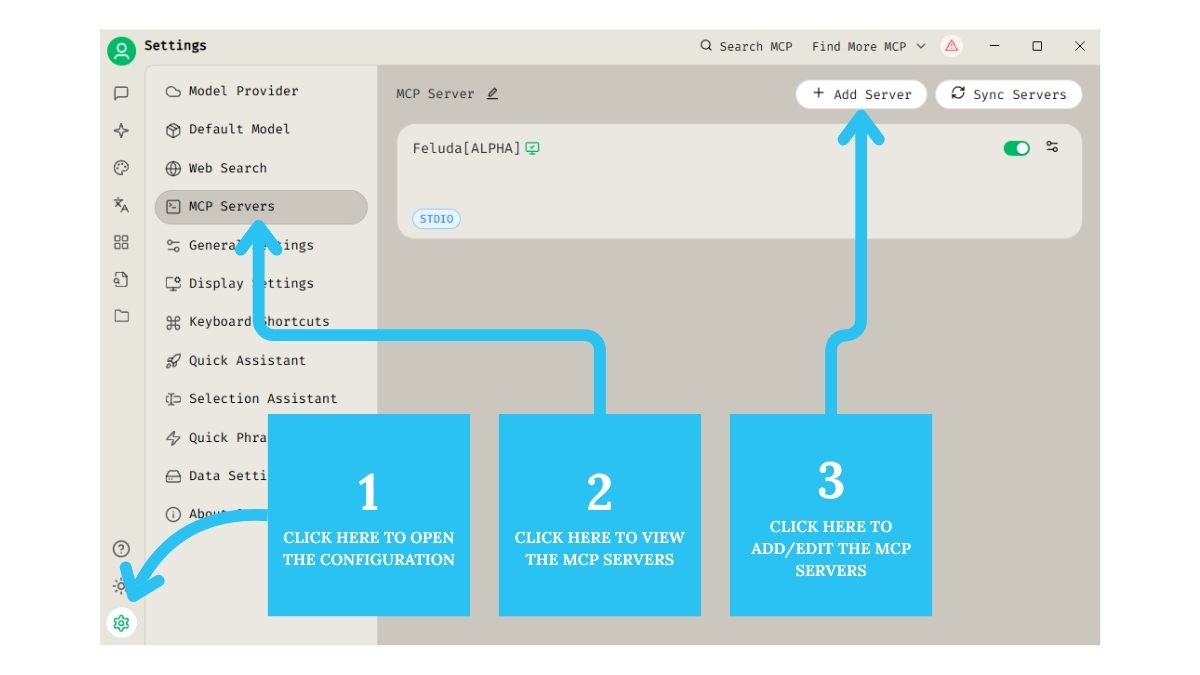
Step 1–3: Locate MCP Servers and add a new local server.
Step 4: Set Executable Path
Browse to the downloaded feluda or feluda.exe and confirm.
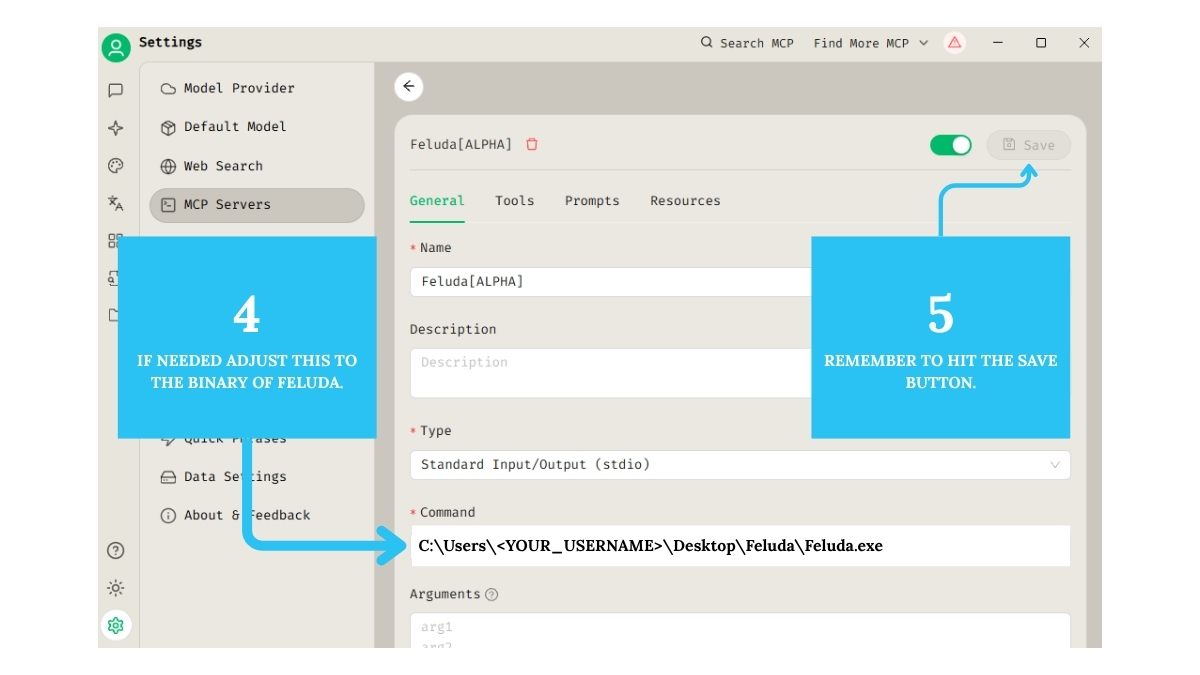
Step 4–5: Set the file path and Save / Confirm.
Step 5: Optional — Place Feluda in Default Directory
To enable auto-detection, move the Feluda binary into one of these folders:
- Windows:
C:\Users\<yourname>\.cherrystudio\bin - macOS/Linux:
~/.cherrystudio/bin
Feluda is now connected as a local MCP server inside Cherry Studio.
Step 6: Add API Keys (Optional)
- Double-click the
feludabinary to open the Vault UI. - Add any API keys (OpenAI, NewsAPI, Shodan, etc.).
- Keys are used automatically by compatible genes/tools.
You're Ready
Cherry Studio is now fully connected to Feluda. Start using modular toolchains, context-aware prompts, and structured memory — all powered by your local assistant server.