Step-by-step Instructions
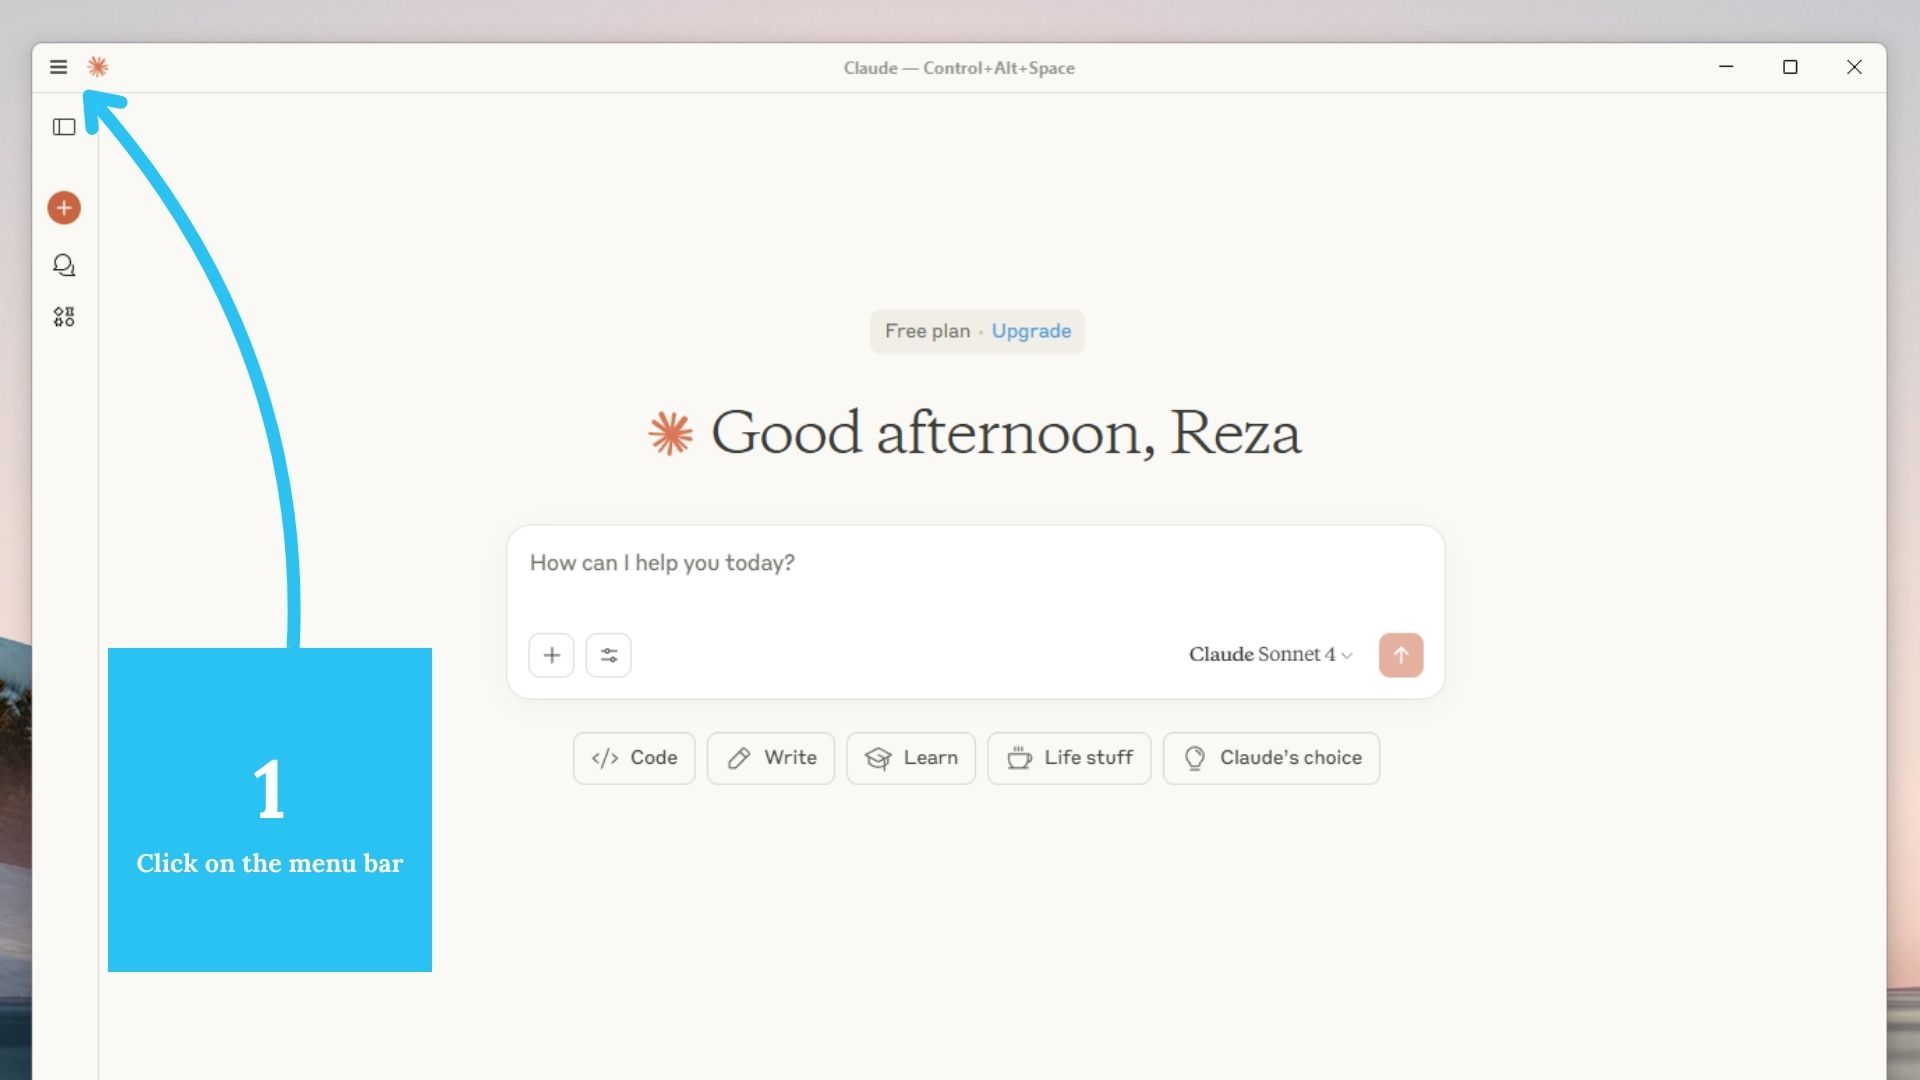
Step 1: Finding the Menu
Open the sidebar or top menu in Claude Desktop to access the settings interface.
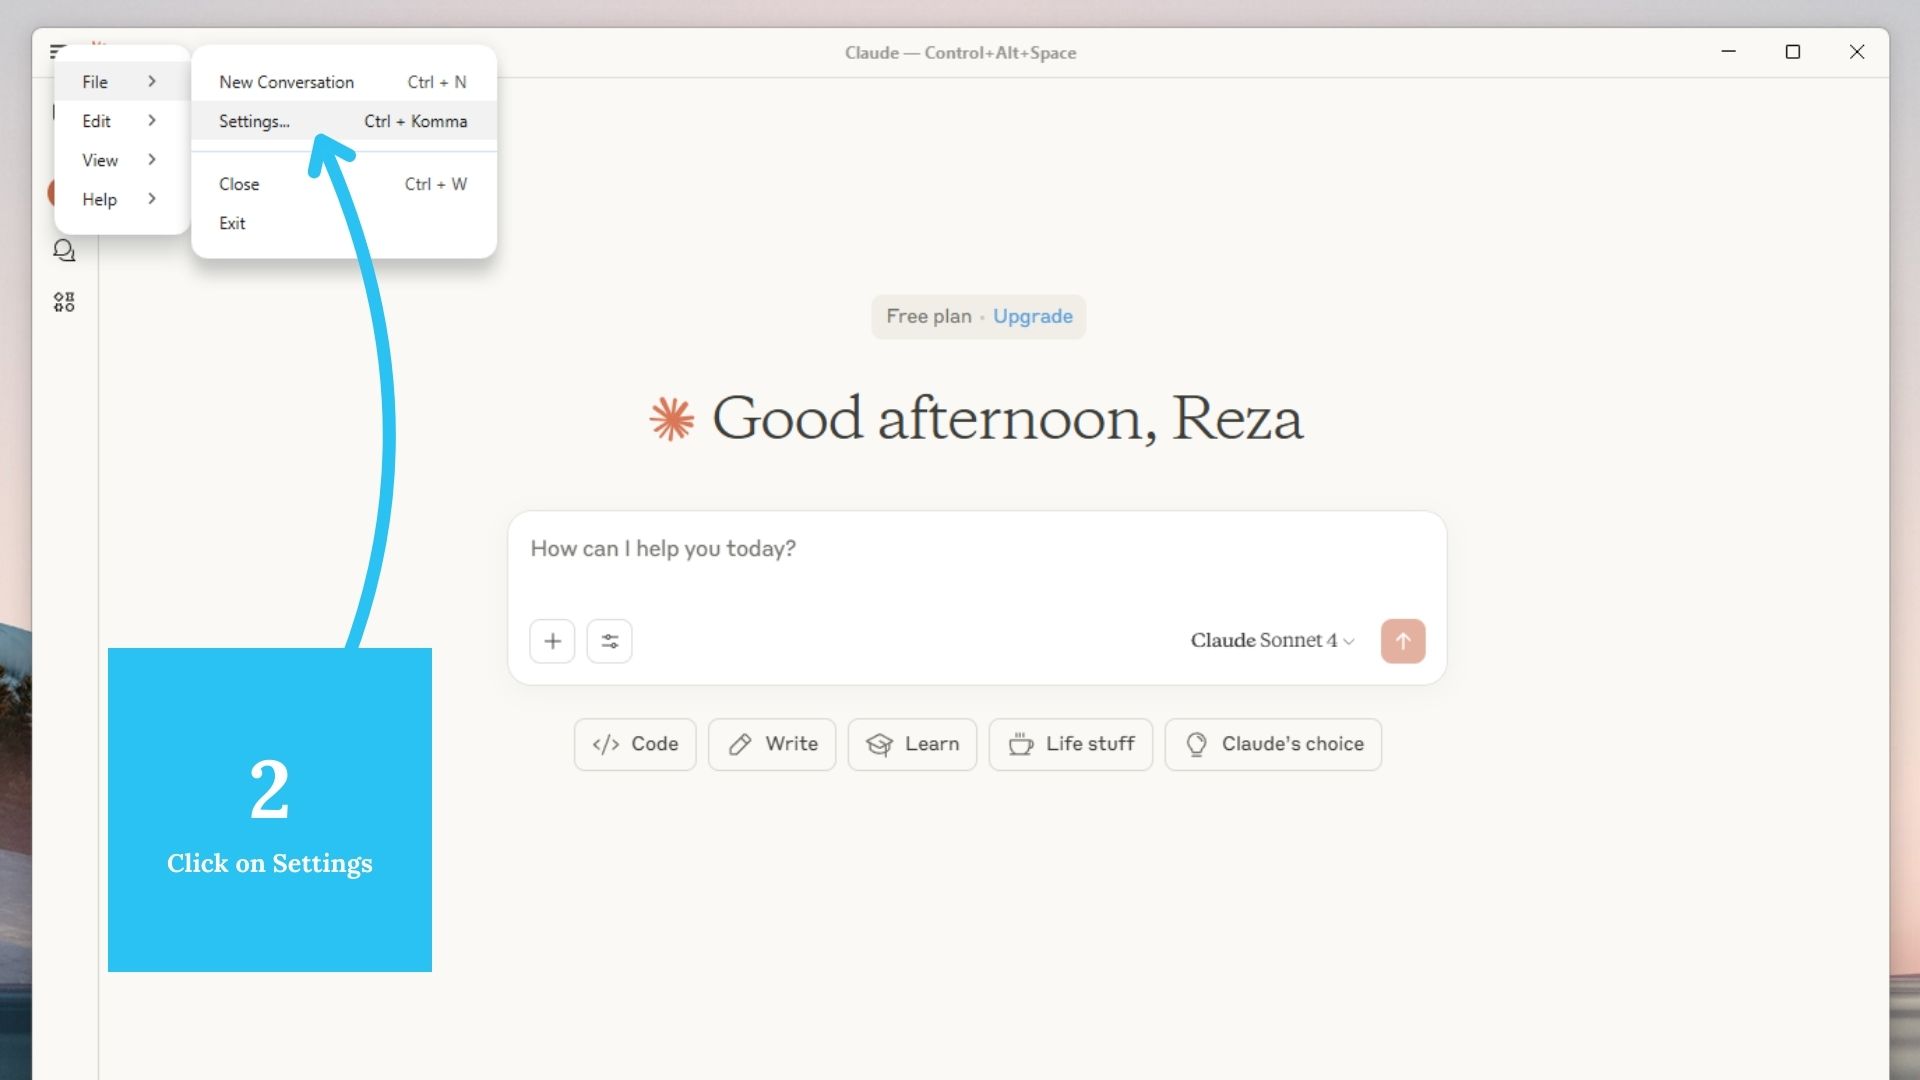
Step 2: Go to Settings
Click on the Settings button in the left-hand sidebar.
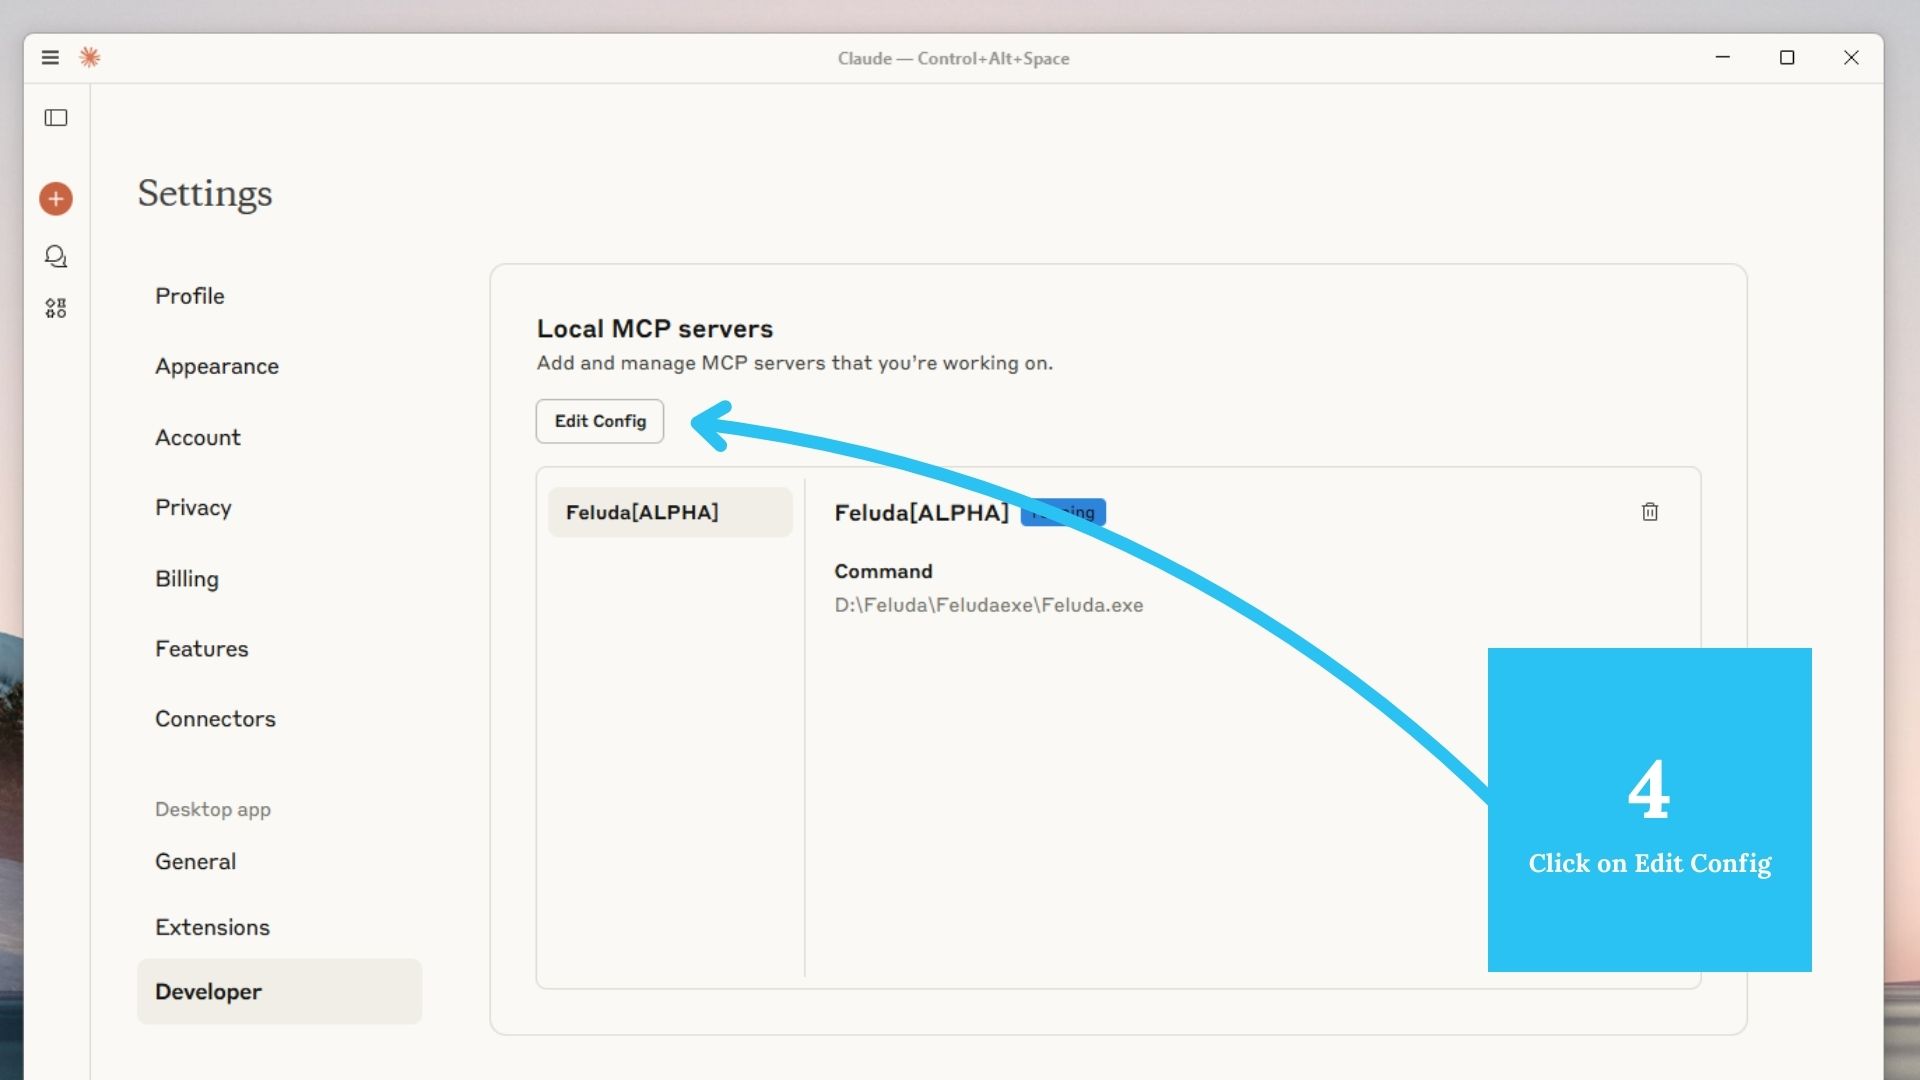
Step 3: Open the Developer Tab
Inside settings, click on the tab labeled Developer — this provides access to Claude's configuration.

Step 4: Click “Edit JSON”
Click Edit JSON. The Claude configuration file opens in your editor.
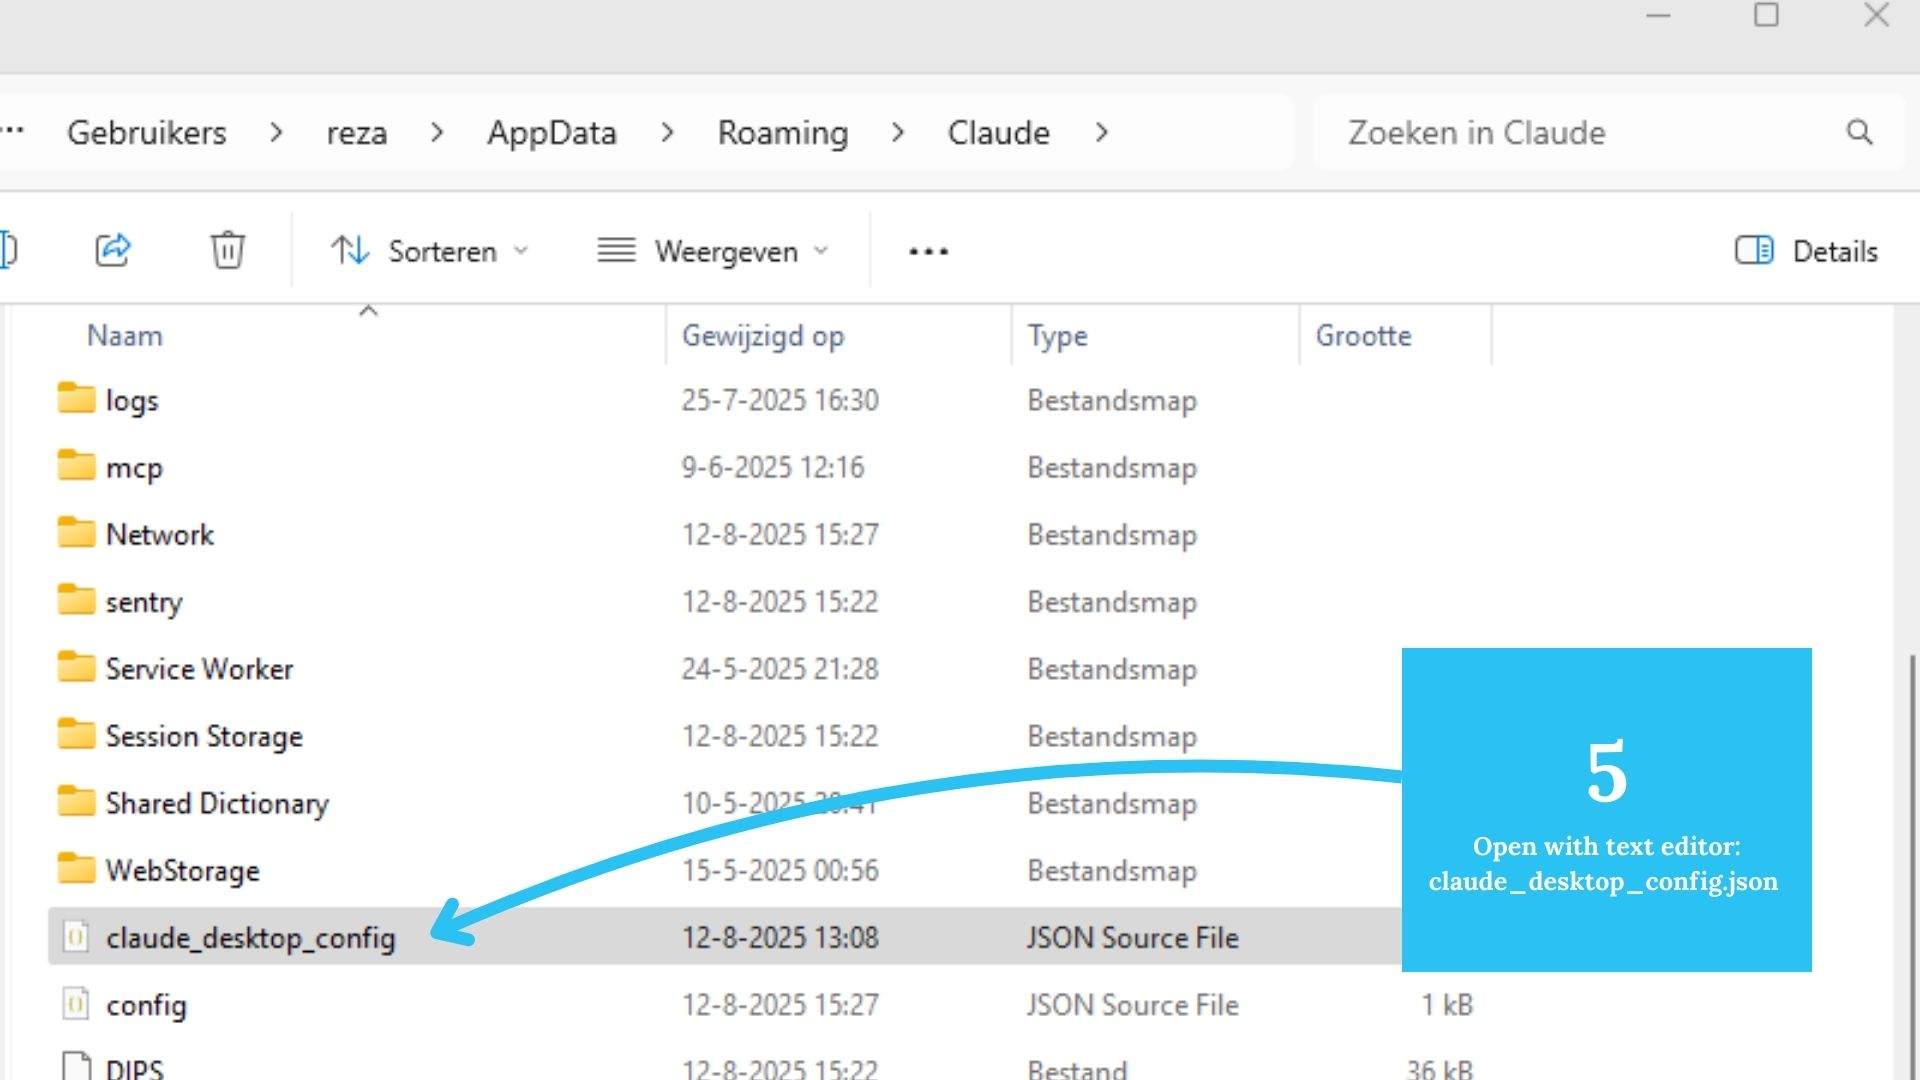
Step 5: Locate the config file
The file is named claude_desktop_config.json. On Windows, it typically lives at:
C:\Users\yourname\AppData\Roaming\Claude\claude_desktop_config.json
Step 6: Add Feluda to mcpServers
Add this block inside the mcpServers section. Update the path to your Feluda executable.
{
  "mcpServers": {
    "Feluda[ALPHA]": {
      "command": "C:\\\\path\\\\to\\\\your\\\\feluda\\\\Feluda.exe",
      "args": []
    }
  }
}
💡 Windows tip: Use double backslashes \\ in JSON paths, or use forward slashes.
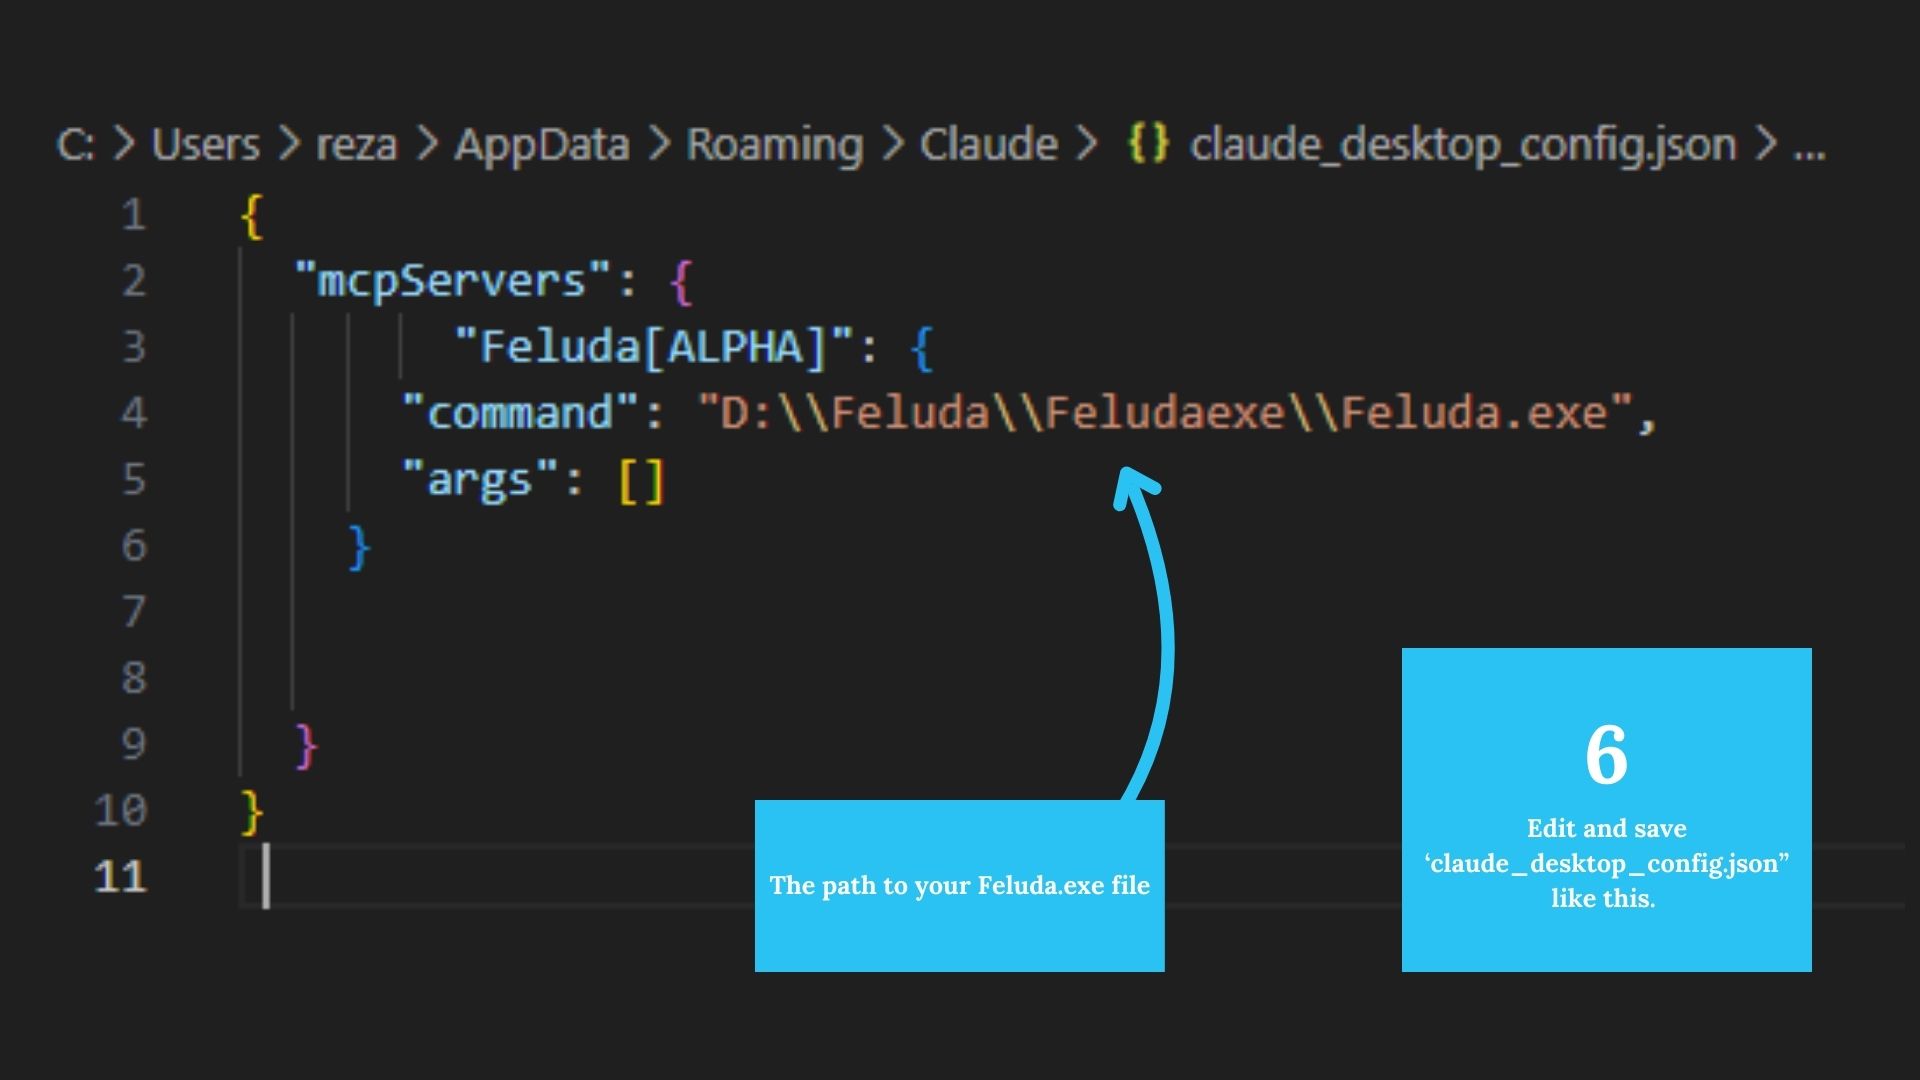
Save the file and restart Claude Desktop. Feluda will appear as an MCP server.
Need to Add API Keys?
- Double-click the
feluda.exe(orfeluda) to open the Vault UI. - Add API keys like OpenAI, NewsAPI, HuggingFace, Shodan, etc.
- Keys are securely stored and automatically available to compatible Feluda tools.
You're Ready!
Claude will now use Feluda as a powerful local MCP assistant. Enjoy local context, memory, external tools, and offline-friendly workflows — all inside Claude Desktop.